
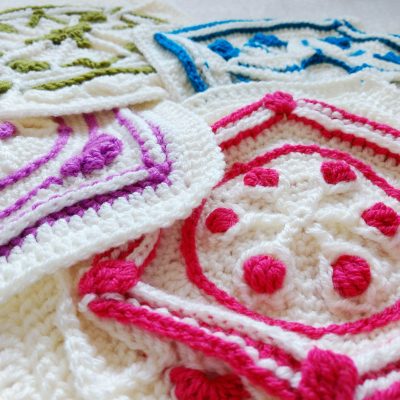
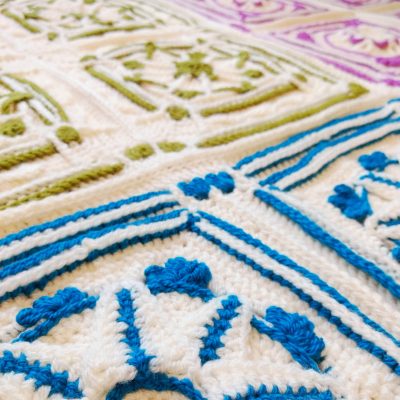
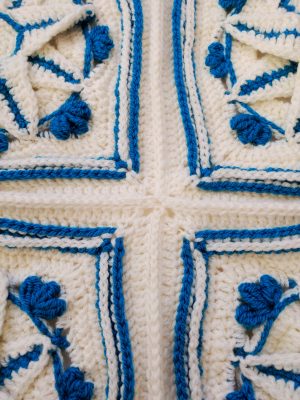
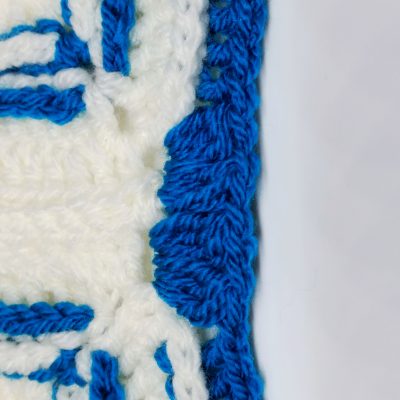
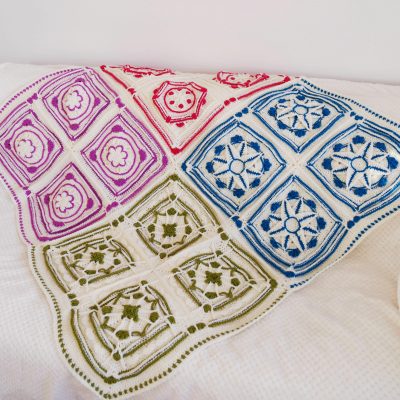
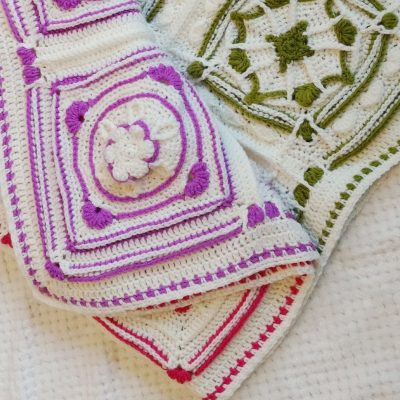
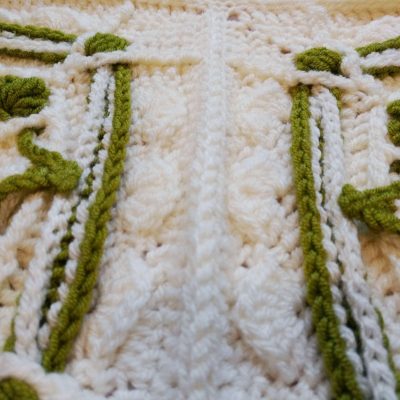
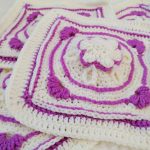
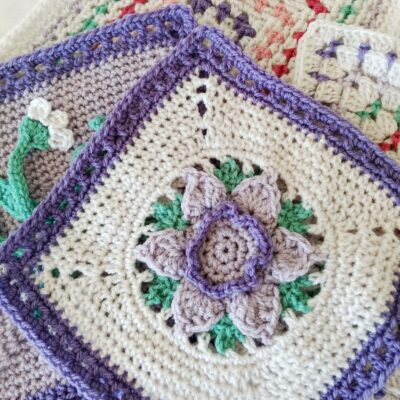
Winter Jewel Lapghan – Join and Border
Wow, I can’t believe this is the final week of the Winter Jewel Lapghan CAL! Time has flown and it has really been a blast. You will be ready to join your squares and add the border when you have four squares of each design, meaning a total of 16 squares.
Below you will find the free pattern for join and border. You can also buy inexpensive ad-free patterns of the individual squares and the full lapghan including the join and border in my Etsy and Ravelry store.
Add Winter Jewels Lapghan to your Ravelry queue here.


Introduction
There are two different ways of laying out your blanket. You can either keep all squares of the same design together in a block of four squares (as shown) or you could make a block of four squares with one square of each design. It is entirely up to you.
You may notice that the square does not appear to have straight edges once you have joined them together. Do not worry, with the full blanket border and blocking they will be straight in the end.
Note: As the final stitch count on the last round of each square is different, I have written this border pattern in a way that is suitable for each design. You will not be counting the stitches of the entire round, but just those stitches before and after the joins and corners.
Materials
For the join and borders you need:
Stylecraft Special DK in the colours Magenta, Empire and Pomegranate and Stylecraft Belissima in Sugar Snap: approx. 20g of each colour
Stylecraft Special DK in Cream: approx. 100g
4mm crochet hook
You can purchase yarn and accessories at lovecrochet and Amazon. (Using the affliate links in texts and images does not cost you any extra but I will earn a small commission that will help me keep posting free patterns).
Size: Approx. 1meter x 1meter (approx. 40inch x 40inch)
Level: Intermediate


Special Stitches
Back post treble crochet – bptr
Chain – ch
Chain n space – ch-n-sp (n = the number of chains)
Double crochet – dc
Front post double crochet – fpdc
Half treble – htr
Slip stitch – ss
3 treble cluster – 3trcl
Pattern notes Please read before starting to crochet
This pattern uses UK terminology. Her you can find a conversion chart from UK to US terminology.
Join each round with a slip stitch.
The square is worked in the round. You do not need to turn your work after each row and you continue working in the same direction as before.
[Stitches written in brackets like this are all worked into the same stitch.]
For the first stitch on each row: Crochet 1 chain to move up to the next round if the round starts with double crochet. Crochet 3 chains if the round starts with treble crochet. These chains count as the first stitch in the row.


Place two squares side by side, and then use Cream to join them using a ss on the front of your work. The slip stitch should only go through the two loops that are closest to each other when you hold the squares together (as shown in the photos above) in order to achieve the texture of the join. Do this twice to make 2 pieces, each consisting of 2 squares.


Tip: If you are joining the squares of different designs, you will notice that the squares have a different number of stitches on the final round. In this case, on the square with the fewest stitches, you will occasionally work one stitch twice, so that it connects to two stitches on the other square. Spread these “double” stitches evenly along the edge of the square.
Join the two pieces consisting of 2 squares in the same way. Fasten off.
Your join will look like a ridge as shown in the photos.
The “frame” for the four square block
Round 1
Using colour (this can be the same colour as used in the squares or you can mix it up). Start in a corner ch-sp, [3trcl, ch 2, 3trcl, ch 1, 3trcl, ch 1], skip 2, bptr across until 2 st before the join, ch 1, skip 2, [3trcl, ch 1, 3trcl, ch 1] into the corner ch-sp on the square before the join, skip the join, [3trcl, ch 1, 3trcl, ch 1] into the corner ch-sp on the square after the join, skip 2, bptr across until 2 stitches before the corner space, ch 1, skip 2. Repeat 4 times. Fasten off.


Round 2
Using Cream. Dc in ch-1-sp before corner, * fpdc over 3trcl, dc in ch-2-sp. From * 3 times. Bptr across until ch-1-sp before join, fpdtr over the ch-1-sp and into row below (into the original square), * fpdc over 3tr cluster, dc in ch-1-sp. From * 2 times. Fpdtr over the ch-1-sp and into row below (this is actually working into the join of the two squares), * fpdc over 3tr cluster, dc in ch-1-sp. From * 2 times. Fpdtr over the ch-1-sp and into row below (into the original square), bptr across until corner. Repeat 4 times.


When you have done this, join all four blocks of four squares using the slip stitch method described above.
Full blanket border
Round 1
Once all parts have been joined, join Cream. Tr in each stitch and ch-sp around including the join stitches. In the corner ch-2-sp, [tr, ch 2, tr].
Round 2
Join colour (for this round, you may want to change the colours as you move to different quadrants). Dc, ch 1, skip 1. Repeat this pattern around the blanket apart from the corner ch-sp, where you [dc, ch1, dc].
Round 3
Join Cream. Dc in ch-1-sp, ch 1, skip 1. Repeat this pattern around the blanket apart from the corner ch-sp, where you [dc, ch1, dc].


Round 4
Round 4: Dc in ch-1-sp, ch 1, skip 1. Repeat this pattern around the blanket apart from the corner ch-sp, where you [dc, ch1, dc].
On this final round, you may notice that around the join, there is a slight dip in the border. If you notice this, you can correct it slightly by making htr instead of dc in a few stitches before and after the join.
Blocking
Important: The Stylecraft Special DK is an acrylic yarn, so you must take precautions to not melt your work. Keep the iron on a low setting and use a damp cloth to lie over your work so that the iron never makes direct contact with your work.
This blanket is best blocked as a full blanket rather than as individual squares.
To do so, spread the blanket on the floor and iron through the wet cloth. You may want to put small weights (such as candle holders etc.) at the corner to shape the blanket while drying.


Once you have blocked the outer edges, you may choose to also block the individual squares and joins where you focus on the textured lines running parallel to each other.
Backing
If you are adding a lining to the back, you can add it now using the Cream yarn and a blanket stitch. I simply cut a piece of fleece to the dimensions of the lapghan and sewed it in place, to give the blanket an extra layer of cosiness.
Congratulations, you have now completed the Winter Jewels Lapghan. I hope that you enjoyed the pattern.
I would love to see your finished Winter Jewels Lapghan, so please:
Tag me on Instagram [crochet_cloudberry]
Link your finished crochet square as a project to my ravelry page [Cat Venner]
Share on Facebook [@CrochetCloudberry]
Or just follow Crochet Cloudberry on Pinterest [Crochet Cloudberry]
You can also use the hashtag #crochetcloudberry or #winterjewelslapghan
This pattern is featured in the Oombawka Wednesday Link Party and on FaveCrafts.


YOU MAY ALSO LIKE


One Comment
Pingback: