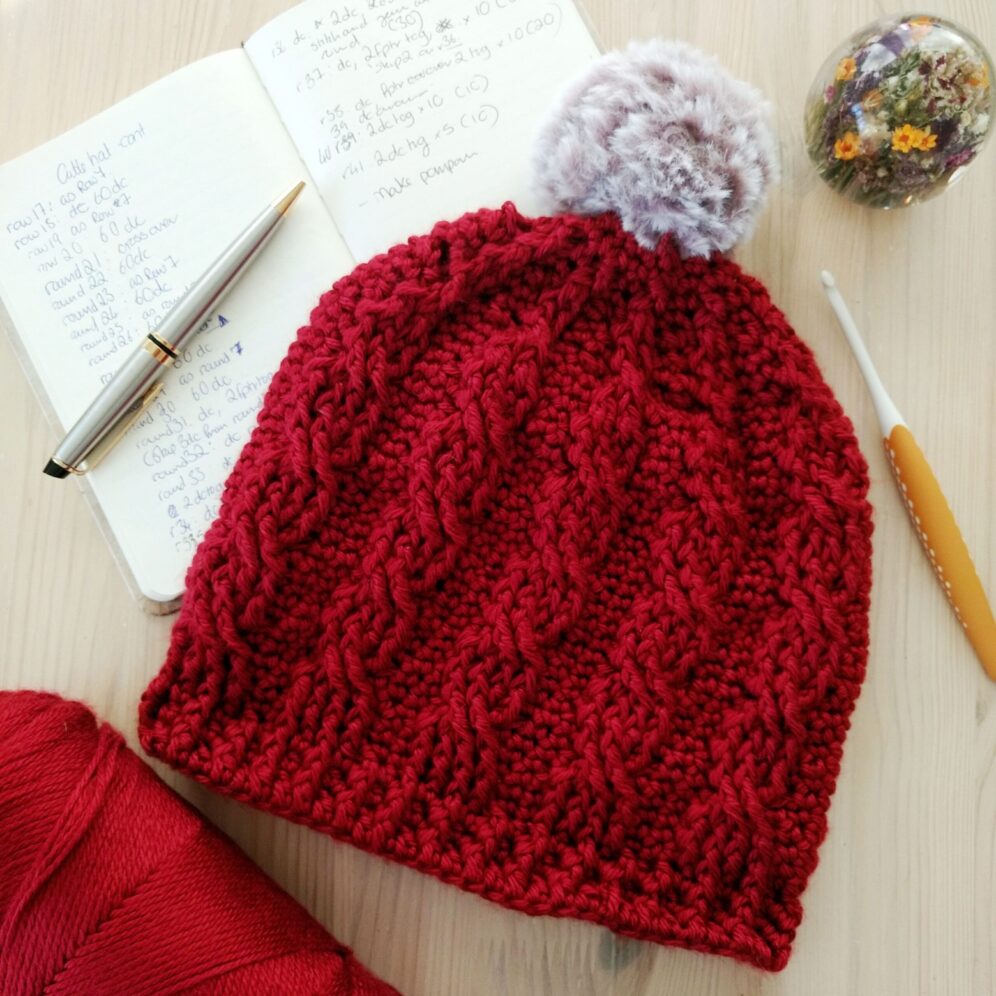
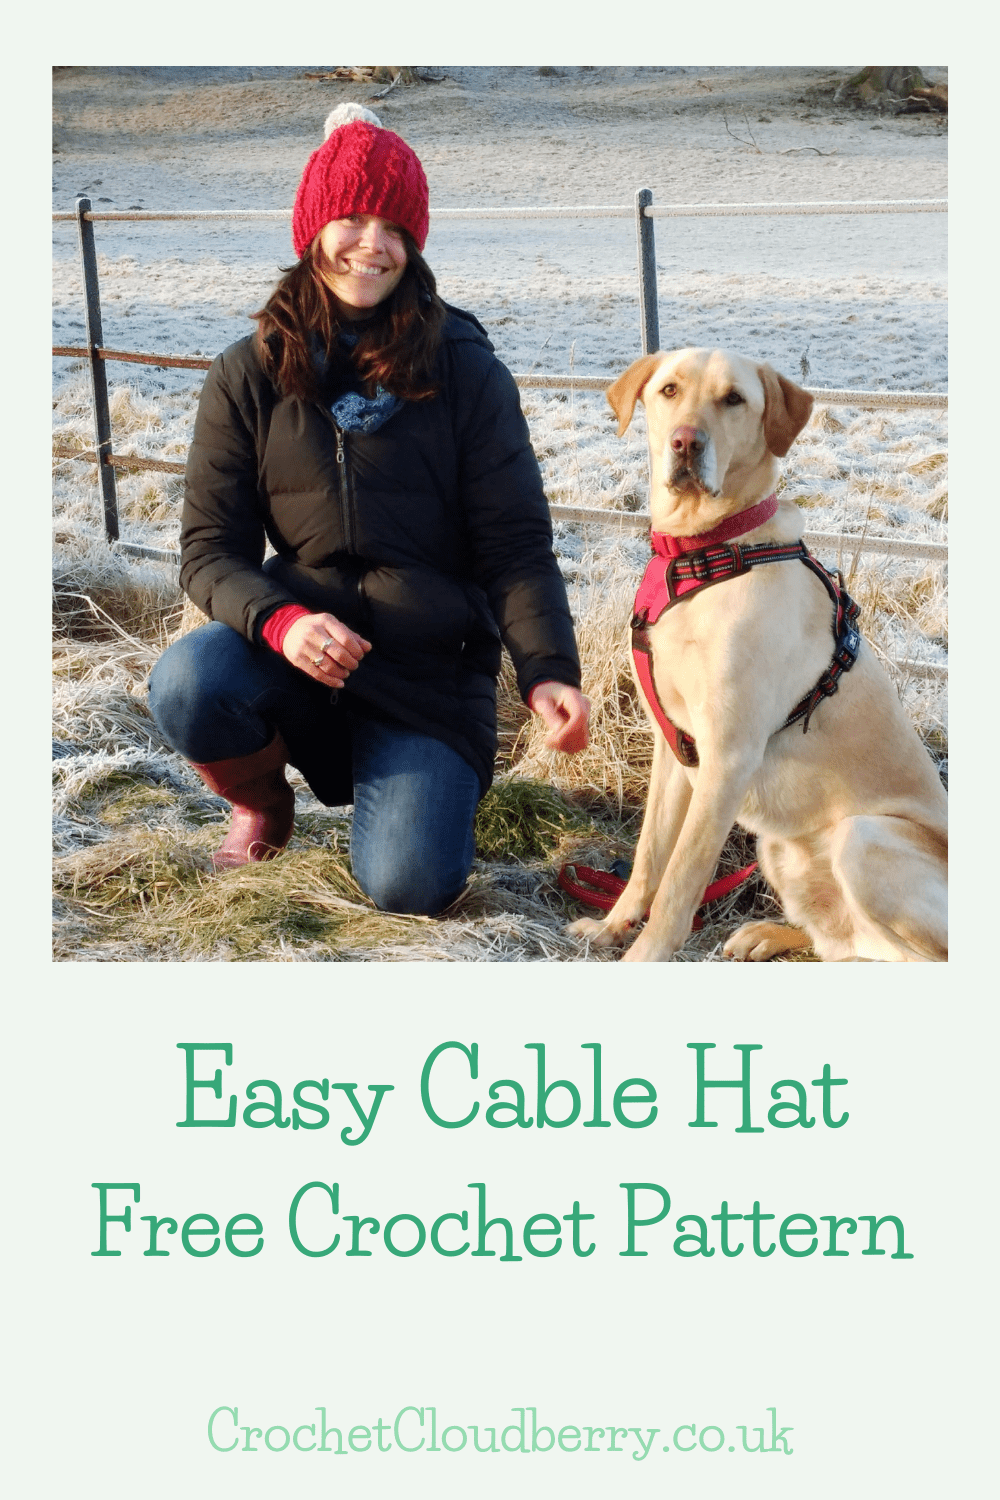
Easy Cable Hat
Stay warm with the Easy Cable Crochet Hat! Right now, it is the coldest time of the year and I barely leave the house without a hat pulled firmly down over my ears and forehead. And so I designed this cable hat to give maximum warmth and a cosy cable look.
My friend Zanna and her dog Jack were the perfect models when I gave her the hat on a very frosty socially distance walk.
You can find the free pattern below or you can purchase a beautiful ad-free pdf pattern on Ravelry. As an introductory offer for the first weekend until 01.02.2021, the pattern will be available for half price when you use the code CABLE HAT at the checkout.


Materials
Caron Simply Soft – approx. 150 gr (approx. 5.3 ounces)
5 mm hook or hook required to get tension as described below
Pompom
Yarn subbing: You can use any other aran/worsted weight yarn, however, always check your gauge when using alternative yarn. You can use the same colour throughout or make stripes with a contrast colour.
You can purchase yarn and accessories at lovecrochet. (Using these links and links to Yarnspirations does not cost you any extra but I will earn a small commission that will help me keep posting free patterns).
Size
Fits a small woman’s head. Approx. 51 cm (20 inches) circumference.
If you need the hat to have a few additional cm circumference, simply add 1 dc per extra cm needed. You can choose where to add these extra stitches (I prefer mine right at the beginning, but you could distribute through the pattern.) You will need to remember how many stitches you have added and where you added them. It might be a good idea to insert small stitch markers in these extra stitches so you know where to add them throughout the pattern.
If you need an extra 5 cm or more, add an extra repeat of the pattern. So where the instructions say 10 times, you should do the stitch combination 11 times or more depending on the number of stitches added. To do this you will also need to add an extra 6 ch per pattern repeat to your foundation row.
You may also find that you want to make an additional horizontal repeat of the cable pattern if you add extra length to the circumference. If you prefer a tighter fitting hat, you may consider leaving out the 5 rounds of the cable repeat.

Add this pattern to your Ravelry queue!

Tension
Tension is important in this hat, and you may find that you need to go up or down a hook size or two to get the right tension. Different brands of aran/worsted weight yarn will produce slightly different size hats. To check your tension, crochet the first two to three rounds and then check that your hat has the desired circumference (51 cm, if you are making the standard hat with no extra length). If you find that you can’t get the tension right with your chosen yarn, you may want to add extra stitches/repeats as described above.
Pattern notes
This pattern is written using UK terminology. You can find a handy conversion chart to US terminology at: https://crochetcloudberry.co.uk/about/uk-to-usa-terminology/
The hat is worked in the round. You do not need to turn your work after each round and you continue working in the same direction as before. You will need to join the final stitch in the round with the first stitch in the round with a slip stitch.
For the first stitch on each round from round 4: Chain 1 to move up to the next round. The chain 1 does not count as a stitch. You then crochet directly on top of the first stitch in the round below and continue as in pattern.
For more information on the easy cable stitch, check out my Youtube video on how to work the cross over row:

Special Stitches
Dc – double crochet
2dctog – work 2 dc together to make a decrease
Fpdtr – front post double treble
Fptr – front post treble
Tr – treble crochet
2fptrtog – work 2 front post treble together to make a decrease. This stitch is worked as a 2trtog, but you are working around the front post of the stitches below
Start crocheting here
Trim
Foundation round: Chain 60, then join with slip stitch to starting chain. (60)
Round 1: Chain 3 (these do not count as a stitch), 60 tr. (60)
Round 2: Chain 2 (these do not count as a stitch), fptr over front of stitch in round 1, tr. 30 times. (60)
Round 3: Chain 2 (these do not count as a stitch), fptr over front of stitch in round 2, tr. 30 times. (60)


Cable Pattern
Round 4: 60 dc. (60).
Round 5: dc, 4fptr (over stitches in round 3), dc. 10 times. (60)
Round 6: 60 dc. (60).
Round 7: dc, 4fptr (over stitches in round 5), dc. 10 times. (60)
Round 8: 60 dc. (60)
Crossover
Round 9: dc, skip 2 and work 2fpdtr over fptr in row7, then fpdtr around each of the 2 skipped fptr stitches in row 7, dc. 10 times.
Round 10: 60 dc. (60)


Cable Repeat
For rows 11 to 28 repeat rows 5 to 10 in sequence. If you are making a larger hat, you may want to repeat the sequence one more time.
Decrease
Round 29: dc, 4fptr (over stitches in round 27), dc. 10 times. (60)
Round 30: 60 dc. (60)
Round 31: dc, 2fptrtog, 2fptrtog, 2dc. 10 times. (50)
Note: In this round you will place the first of the 2dc behind the second 2fptrtog. This will mean that you have 3dc in total between the cables.
Round 32: 50 dc (50).
Round 33: dc, skip 2fptrtog and work 1fpdtr over fptrtog in row 31, then work 1fpdtr into the 2fptrtog you skipped in row 31, 2dctog. 10 times. (40)
Round 34. 40 dc around. (40)
Round 35: dc, 2fptr over 2fptr in round 33, dc. 10 times. (40).
Round 36: dc, *2dc, 2dctog. From * 9 times. Skip the final stitch and work slip stitch into stitch at start of round. (30)
Round 37: dc, 2fptrtog over 2fptr in round 35. 10 times. (20)
Round 38: 20 dc (20)
Round 39: dc, fptr over 2fptrtog in round 37. 10 times (20)


Round 40: 2dctog. 10 times. (10)
Round 41: 2dctog. 5 times. (5).
Fasten off, leaving a long tail to gently sew up the hole and then add a pompom of your choice.
Optional Trim
Use same colour or contrast colour.
You are now working into the bottom side of the foundation round.
Round 1: dc, fptr over tr in round 1. 30 times. (60).
You should make sure the fptr is worked into the same tr as the fptr in round 2 is worked into. This will ensure a ribbed effect.
I would love to see your finished Easy Crochet Cable hats, so please:
Tag me on Instagram [crochet_cloudberry]
Link your finished crochet square as a project to my ravelry page [Cat Venner]
Share on Facebook [@CrochetCloudberry]
Or just follow Crochet Cloudberry on Pinterest [Crochet Cloudberry]
You can also use the hashtag #crochetcloudberry


YOU MAY ALSO LIKE


3 Comments
Isabel para Alromasar
Hello!
I come to visit you from The Loop Scoop 7 where I also participate.
I like your artwork.
Thanks for sharing.
Greetings from Spain
Crochet Cloudberry
Lovely, thanks so much for stopping by!
Pingback: