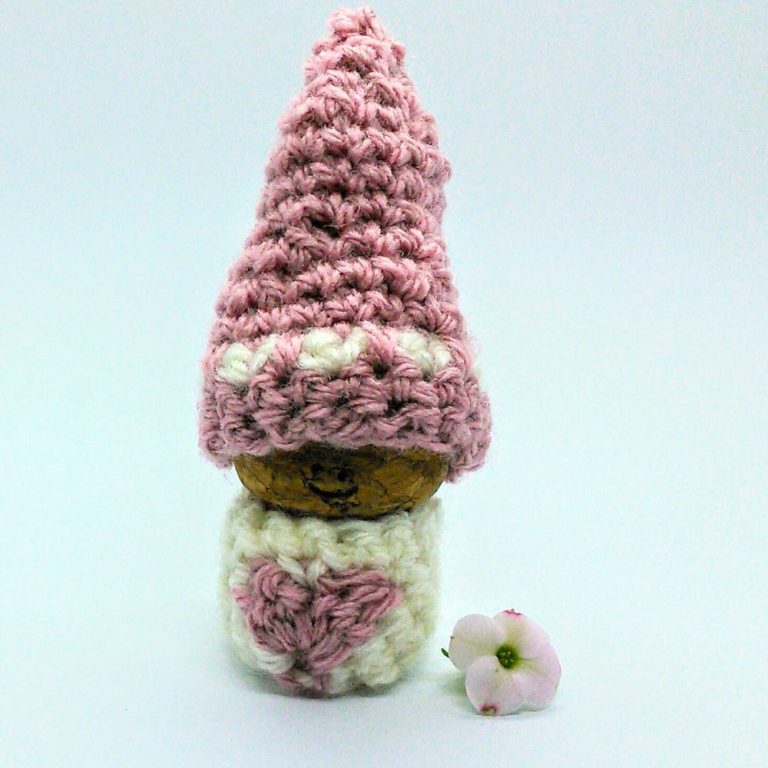
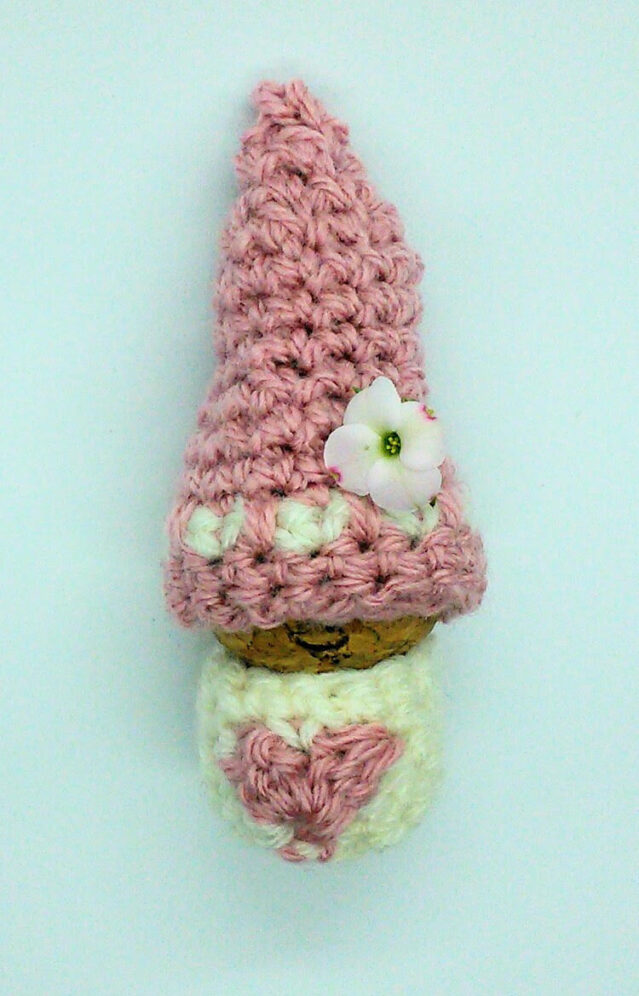
Well Valentine’s Day is just round the corner and it is time to share a little love. Not only with your partner, but with your parents, children, friends or your favourite cork gnome. It is nice to take a little time to show someone you love that you appreciate them. With this in mind, I designed this little cork love gnome. He is more than happy to share his love with our resident bee gnome and snowdrop gnome, making ours a home full of happy gnomes.
Materials
If you want to make this cute love gnome. You will need
1 cork (approx. 2.5 cm diameter) (if you don’t have a cork to hand you can buy recycled corks or make an amigurumi cork)
(Using these links for Amazon and LoveCrochet does not cost you any extra but I will earn a small commission, will help me keep posting free patterns)
Pattern notes
This pattern uses colour changes within the rounds.
At the end of each round, join with slip stitch and chain 1 to move up to the next round.
The pattern is written using UK terminology, for a conversion chart to US terminology click this link.
Special stitches: treble cluster and decreases
Instructions
Body
Foundation round: Using cream/white chain 14 and join with slip stitch. Chain 1 to start next round.
1st round: 1 dc into each chain. (14 dc)
2nd round: 1 dc in next 7 stitches, change to pink, 1 dc and change to cream, 1 dc in next 6 stitches. (14 dc)
3rd round: 1 dc in next 6 stitches, change to pink, miss 1 (1 treble cluster into top of the pink stitch from round below, chain 1, 1 treble cluster in same stitch) change back to cream, miss 1, dc in to next 5 dc. At the end of this row you can cut and fasten off the pink yarn. (11 dc, 2 treble clusters and 1 chain-1-space)
4th round: 1 dc in next 6 stitches, chain 1, miss 1 (this is the top of the first cluster on previous round), 1 dc into chain-1-space in previous round, chain 1, miss 1 (this is the top of the second cluster on the previous round), 1 dc in to next 5 stitches. (12 dc and 2 chain-1-spaces)
5th round: 1 dc in every stitch and chain-space. (14 dc) Fasten off.
Hat
Foundation round: Using pink chain 18 and join with slip stitch. Chain 1 to start next round.
1st round: 1 dc in each foundation chain. (18 dc).
2nd round: 1 dc in each stitch (18 dc). Fasten off pink. When fastening off, it is worth bearing in mind that you may want to turn the hat inside out at the end, so that the cream/white stitches look more like hearts.
3rd round: Using cream/white. Start anywhere in the round, 2 dc into the same stitch, *miss 1, 2 dc in next stitch. Repeat from * until the round is complete. Fasten off. (18 dc)
4th round: Using pink. Start between any two dcs into the same stitch from round 3, *1 dc in between these 2 stitches, then 1 dc into the dc that was missed in round 2. Repeat from * until the round is complete. Fasten off cream/white. (18 dc)
5th round: 1 dc in every stitch. (18 dc)
6th round: Work 1 dc in every stitch round with 4 decreases spread evenly over the hat. (14 dc)
7th round: Work 1 dc in every stitch round with 4 decreases spread evenly over the hat. (10 dc)
Rounds 8 to 10: work 1 dc in every stitch.
Round 11: Work 1 dc in every stitch round with 4 decreases spread evenly over the hat. (6 dc)
For the tip of the hat, work decreases over all stitches, until you have created a point.
Fasten off.
You may want to turn the hat inside out so that white/cream stitches have more of a heart shape to them.
Now all that remains to be done, is to give your little love gnome to the one you love.
As with all my free patterns please feel free to make and sell the crochet items, however, please credit me as the designer where possible and do not sell the pattern itself.


3 Comments
Sue Williams
A lovely idea and pattern! I look forward to making one. Thank you for sharing the pattern.
Crochet Cloudberry
You are welcome. Hope you have fun making him!
Pingback: